
Building a kubernetes homelab with Raspberry Pi and Lego: Persistent Data Storage for PVC's
While most apps are stateless, the often do need to store state somewhere. In Kubernetes you can use a Persistent Volume Claim. That claims a piece of storage for the pod for now and in the future.
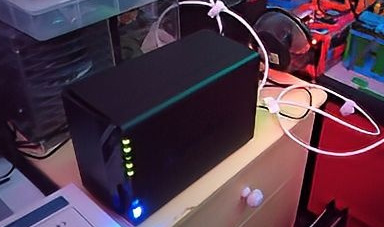
Why A Synology DS NAS
My first NAS was a Netgear ReadyNAS, cute little two bay NAS that was heavy, almost as if they put concrete at the
bottom like with washing machines. Worked fine, but after a while it didn't get updates anymore and became slower and
slower. The OS was also rather out of date with no real good way to install apps. You could SSH into it but all you
would find was a locked down busybox.
Around the time we last moved I was looking at the Synology DS series. It had all the cool features like a dashing WebUI, Docker, software center to install other apps. Run a DS414+ that for years until a few months ago one of the drives started failing. Giving it was coming up 8 years in age it was time to replace it. Went with a DS220+, the DS415+ had four bays but only ever used three of them, so two drives should be enough after clean up and bigger drives.
Why not Longhorn
Before going with the NAS over NFS for storage, I tried out Longhorn. Absolutely love how it
works by using the nodes local SSD for storage and making sure you have 3 copies of your PV contents. At some point I
still want to try again. But switched to the NAS over NFS because I couldn't get the automated backup and restore to
work properly.
NAS Set up
Now I'm not going to walk you through the entire creation of a share. But I trust you can figure that out yourself. Two things are important to do. First enable NFS:
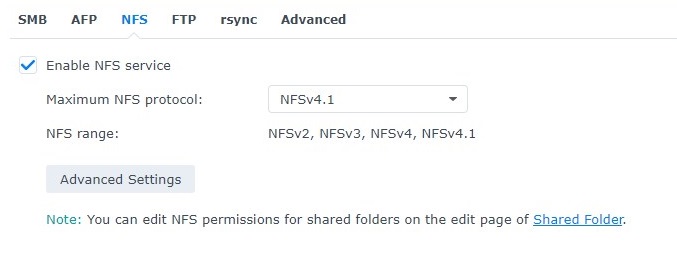
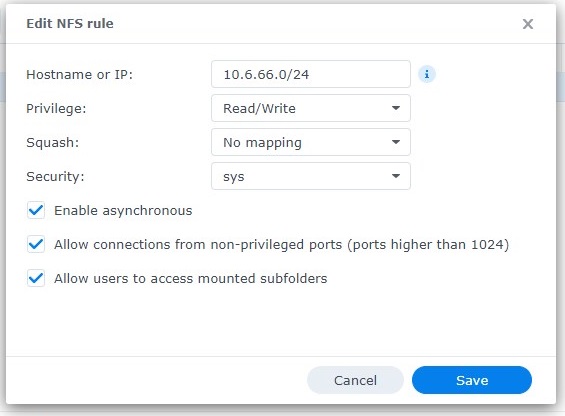
Then on the share be sure to limit access to only the IP range the cluster runs in, 10.6.66.0/24 in my case:
Cluster Set up
To use the NFS server on the cluster we're going to use the
Kubernetes NFS Subdir External Provisioner.
It is available through a helm chart, and with this TerraForm we can install that chart on the cluster.
resource "helm_release" "nfs-subdir-external-provisioner" {
  name = "nfs-subdir-external-provisioner"

  repository = "https://kubernetes-sigs.github.io/nfs-subdir-external-provisioner"
  chart      = "nfs-subdir-external-provisioner"

  namespace        = "nfs-subdir-external-provisioner"
  create_namespace = true
  atomic           = true
  timeout          = var.helm_timeout

  values = [
    "${file("${path.module}/helm.values.yaml")}"
  ]
}
(In a future post we'll cover how to TerraForm is set up and used, and this post will be updated with a link to that.)
As you might have noticed there is a reference to a values file in there, that is because we like to customize a few things
beyond the default settings. There are two things important in that file. First the nfs section to configure the
server. The most significant options for is are the servers hostname or IP, and the path on the NAS where the shared
folder is. (Don't ask it's a NFS think.)
nfs:
  server: nfs.home.internal
  path: /volume1/k8s_pvc
  reclaimPolicy: Retain
The second thing is the storageClass section. There are a few things to mention, yes we want to create a storage
class for this, and make it the default with a name. We also want a fixed path pattern so we can recognize what is in
there in case we want to have a look. We don't delete any data just in case we archive it.
# For creating the StorageClass automatically:
storageClass:
  create: true
  defaultClass: true
  name: nfs-client
  allowVolumeExpansion: true
  reclaimPolicy: Delete
  archiveOnDelete: true
  pathPattern: "${.PVC.namespace}_-_-_-_${.PVC.name}"
Usage
Now we can use it like any other PVC and request storage, just set the storageClassName to nfs-client. Here is the
one generated by my Home Assistant installation on the cluster.
apiVersion: v1
kind: PersistentVolumeClaim
metadata:
  name: home-assistant-storage
  namespace: home-assistant
spec:
  accessModes:
    - ReadWriteOnce
  resources:
    requests:
      storage: 8Gi
  storageClassName: nfs-client